The condition of a TBM disc cutter cannot be judged by tunnelling distance alone. Cutters at different positions work under different loads, while ground conditions and rotation also affect how quickly damage develops.
Our previous article, Common Wear Patterns and Failure Modes of TBM Disc Cutters, explains how uniform wear, flat wear, ring fracture, bearing damage and seal failure appear. This article focuses on the next question faced by a maintenance team: Can the cutter remain in service, or should it be removed?
Actual inspection and replacement must follow the cutter manufacturer’s specifications, the TBM maintenance manual and the project’s safety procedure.
During an approved maintenance shutdown, remove loose material around the cutter ring and housing. Packed fines, mud or rock fragments can conceal leakage, restrict rotation and hide surface damage.
Confirm the cutter number and cutterhead position. Center, face and gauge cutters do not work under identical conditions. If records are available, check the last measurement and earlier comments.
Record at least:
• Cutter number and cutterhead position
• Cutter model or original diameter
• Previous measurement, if available
• Excavation interval since the last inspection or replacement
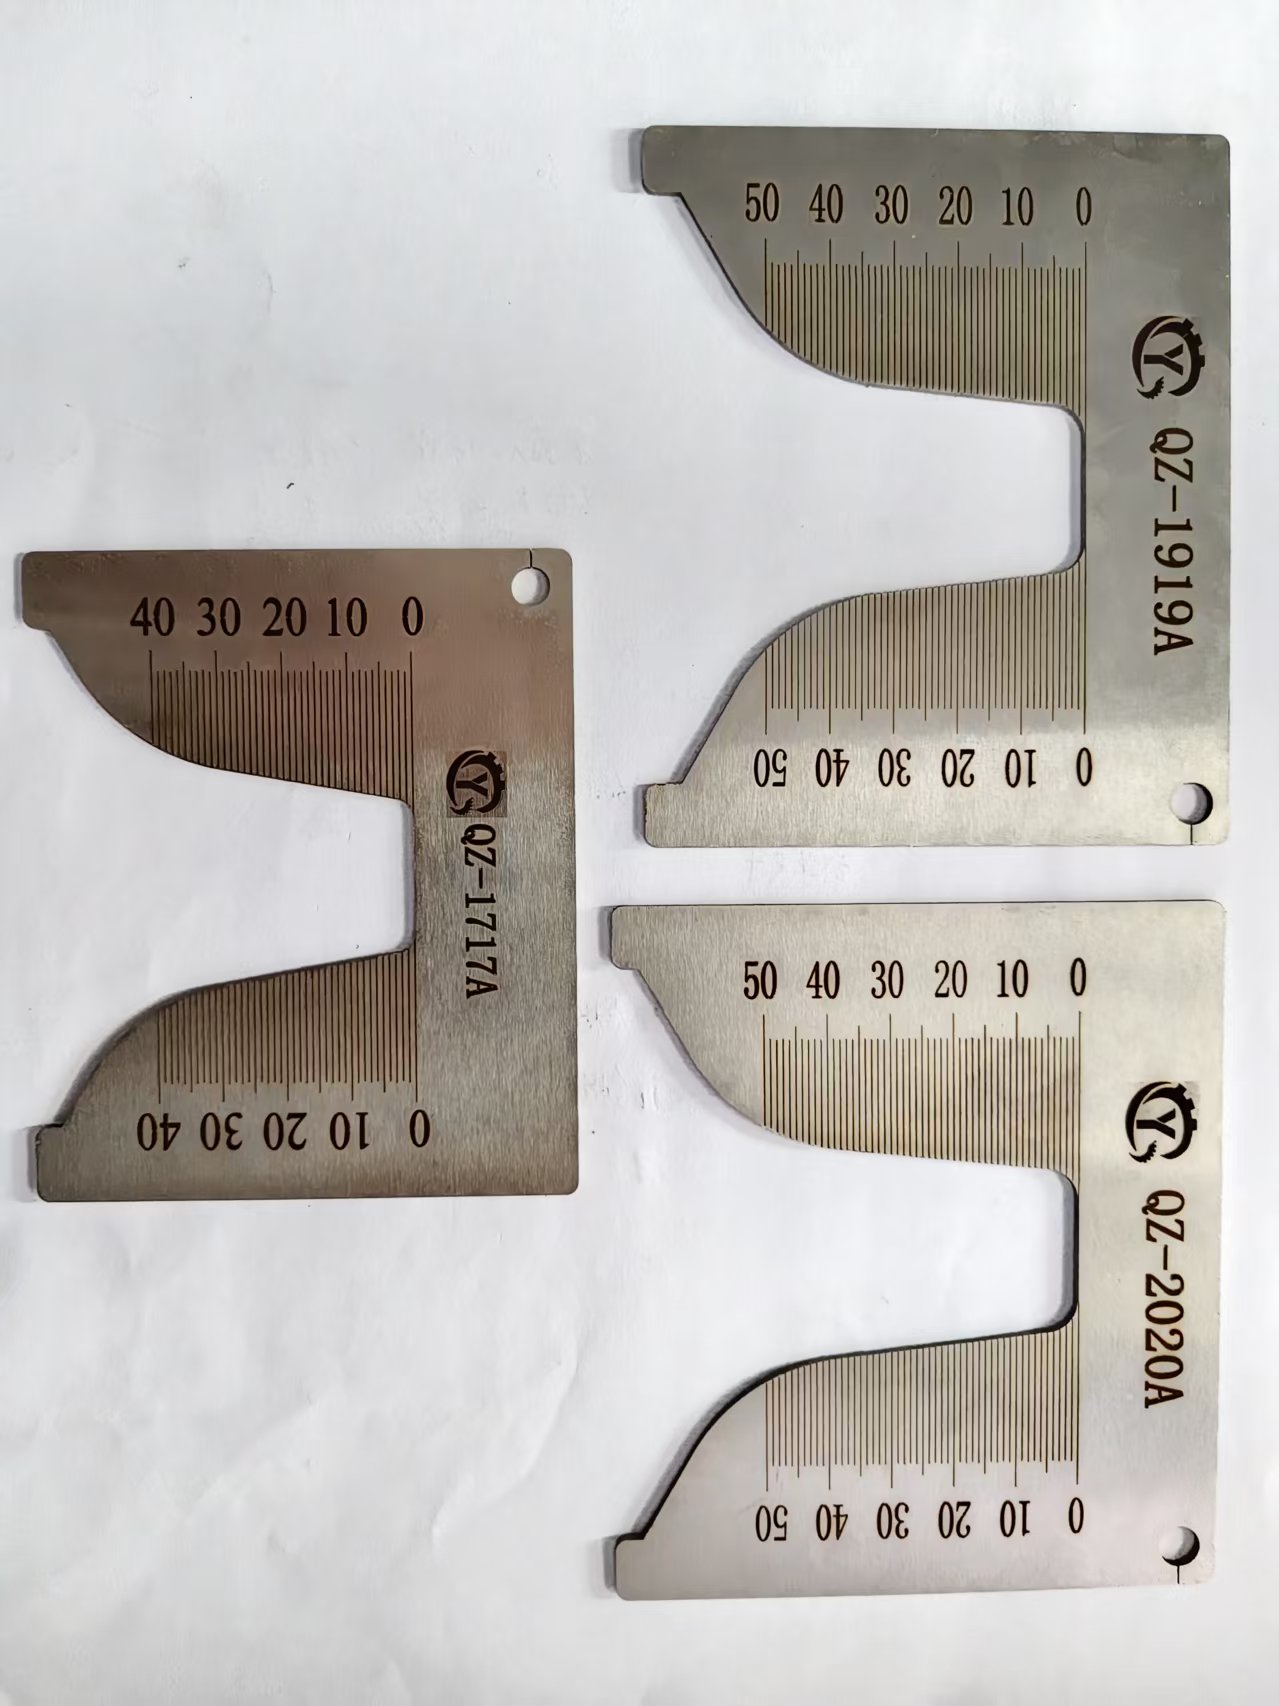
Cutter-ring wear can be checked using a model-specific wear gauge or a suitably sized vernier caliper. Use the same measuring method and reference for each inspection, then record the result according to the definition used in the cutter specification or project maintenance record.
One reading is not enough. Check several points around the circumference. Similar readings generally indicate uniform wear. A noticeably higher reading at one position may reveal eccentric or flat wear that would be missed if only one point—or only an average value—were considered.
Compare the readings with the allowable limit for the specific cutter model. Do not apply the wear limit of one 17-inch or 19-inch cutter automatically to another design.
Use the results as follows:
Uniform wear below the limit: record the value and continue monitoring.
Wear approaching the limit: consider the recent wear trend and the next planned inspection before deciding whether to keep the cutter in service.
Wear at or beyond the specified limit: replace the cutter.
Large differences between measuring points: mark the cutter as abnormal and check its rotation, bearings and visible damage before deciding whether it must be removed.
Wear measurement is therefore one part of the decision. It should be considered together with rotation condition, leakage and structural damage.
A cutter may remain within its wear limit but still be unsuitable because it no longer rotates correctly. Check it for excessive tightness, looseness or uneven resistance and, where appropriate, compare it with similar cutters.
Look for:
• A cutter that cannot rotate
• Binding or uneven resistance during rotation
• Rough movement or unusual noise
• Abnormal axial or radial looseness
• A local flat area associated with restricted rotation
A seized or rough-running cutter should be removed so the bearings, seals, shaft and internal condition can be examined. Continued sliding can quickly turn a rotation problem into severe flat wear.
After refurbishment and reassembly, the cutter should rotate evenly and its starting torque should be measured and recorded. A cutter that is excessively tight, loose or uneven in rotation should be dismantled and rechecked. The acceptable torque must follow the assembly specification for the relevant cutter rather than a universal value.
Some conditions do not require a long wear calculation. The cutter should be removed promptly for replacement or technical assessment when inspection finds:
• A severe flat that affects rolling contact
• A visible crack extending into the cutter ring
• Large broken sections or serious cutting-edge damage
• A loose, displaced or detached cutter ring
• Oil or grease leakage together with rough rotation, seizure or abnormal play
• Damage or deformation of the cutter body, shaft or mounting area
• Any condition that does not meet the project’s safety or acceptance criteria
The causes are covered in the previous wear-pattern article. Here, the question is whether the cutter can safely complete the next operating interval.
Access conditions, ground stability and the maintenance plan may limit the next opportunity to inspect the cutterhead.
If a cutter is close to its wear limit, estimate whether it is likely to remain serviceable until the next planned inspection. The decision should consider:
• Current wear and recent wear progression
• Cutter position and the condition of adjacent cutters
• Expected ground conditions in the next drive section
• Remaining distance to the next planned inspection point
• The consequence of an unplanned cutter intervention
Preventive replacement may be reasonable when the remaining margin is small and the next safe inspection is far away. This is a project decision, not a universal wear value.
Compare the cutter with its neighbors. A large height difference can redistribute the load, while similar abnormal wear across several positions may indicate a wider cutterhead or loading problem.
If one cutter has developed severe flat wear or stopped rotating, inspect the neighboring positions for accelerated wear or impact damage. Replacing only the most visibly damaged cutter may not solve the full problem.
The inspection should end with one clear action for each cutter:
The cutter is within the specified wear limit, rotates normally and has no unacceptable leakage, looseness or structural damage.
The cutter remains within the acceptance criteria but is approaching its wear limit or shows a change that should be checked again at the next available inspection.
The cutter has a worn ring, suspected bearing or seal problem, or another replaceable component fault, while the body and other load-bearing parts may still be serviceable. The final decision should be made after dismantling and inspection under the approved repair standard.
The cutter has reached its specified limit, cannot rotate correctly, contains unacceptable structural damage, or cannot safely remain in operation until the next inspection. A cutter with cracked, deformed or severely damaged load-bearing parts may not be suitable for refurbishment.
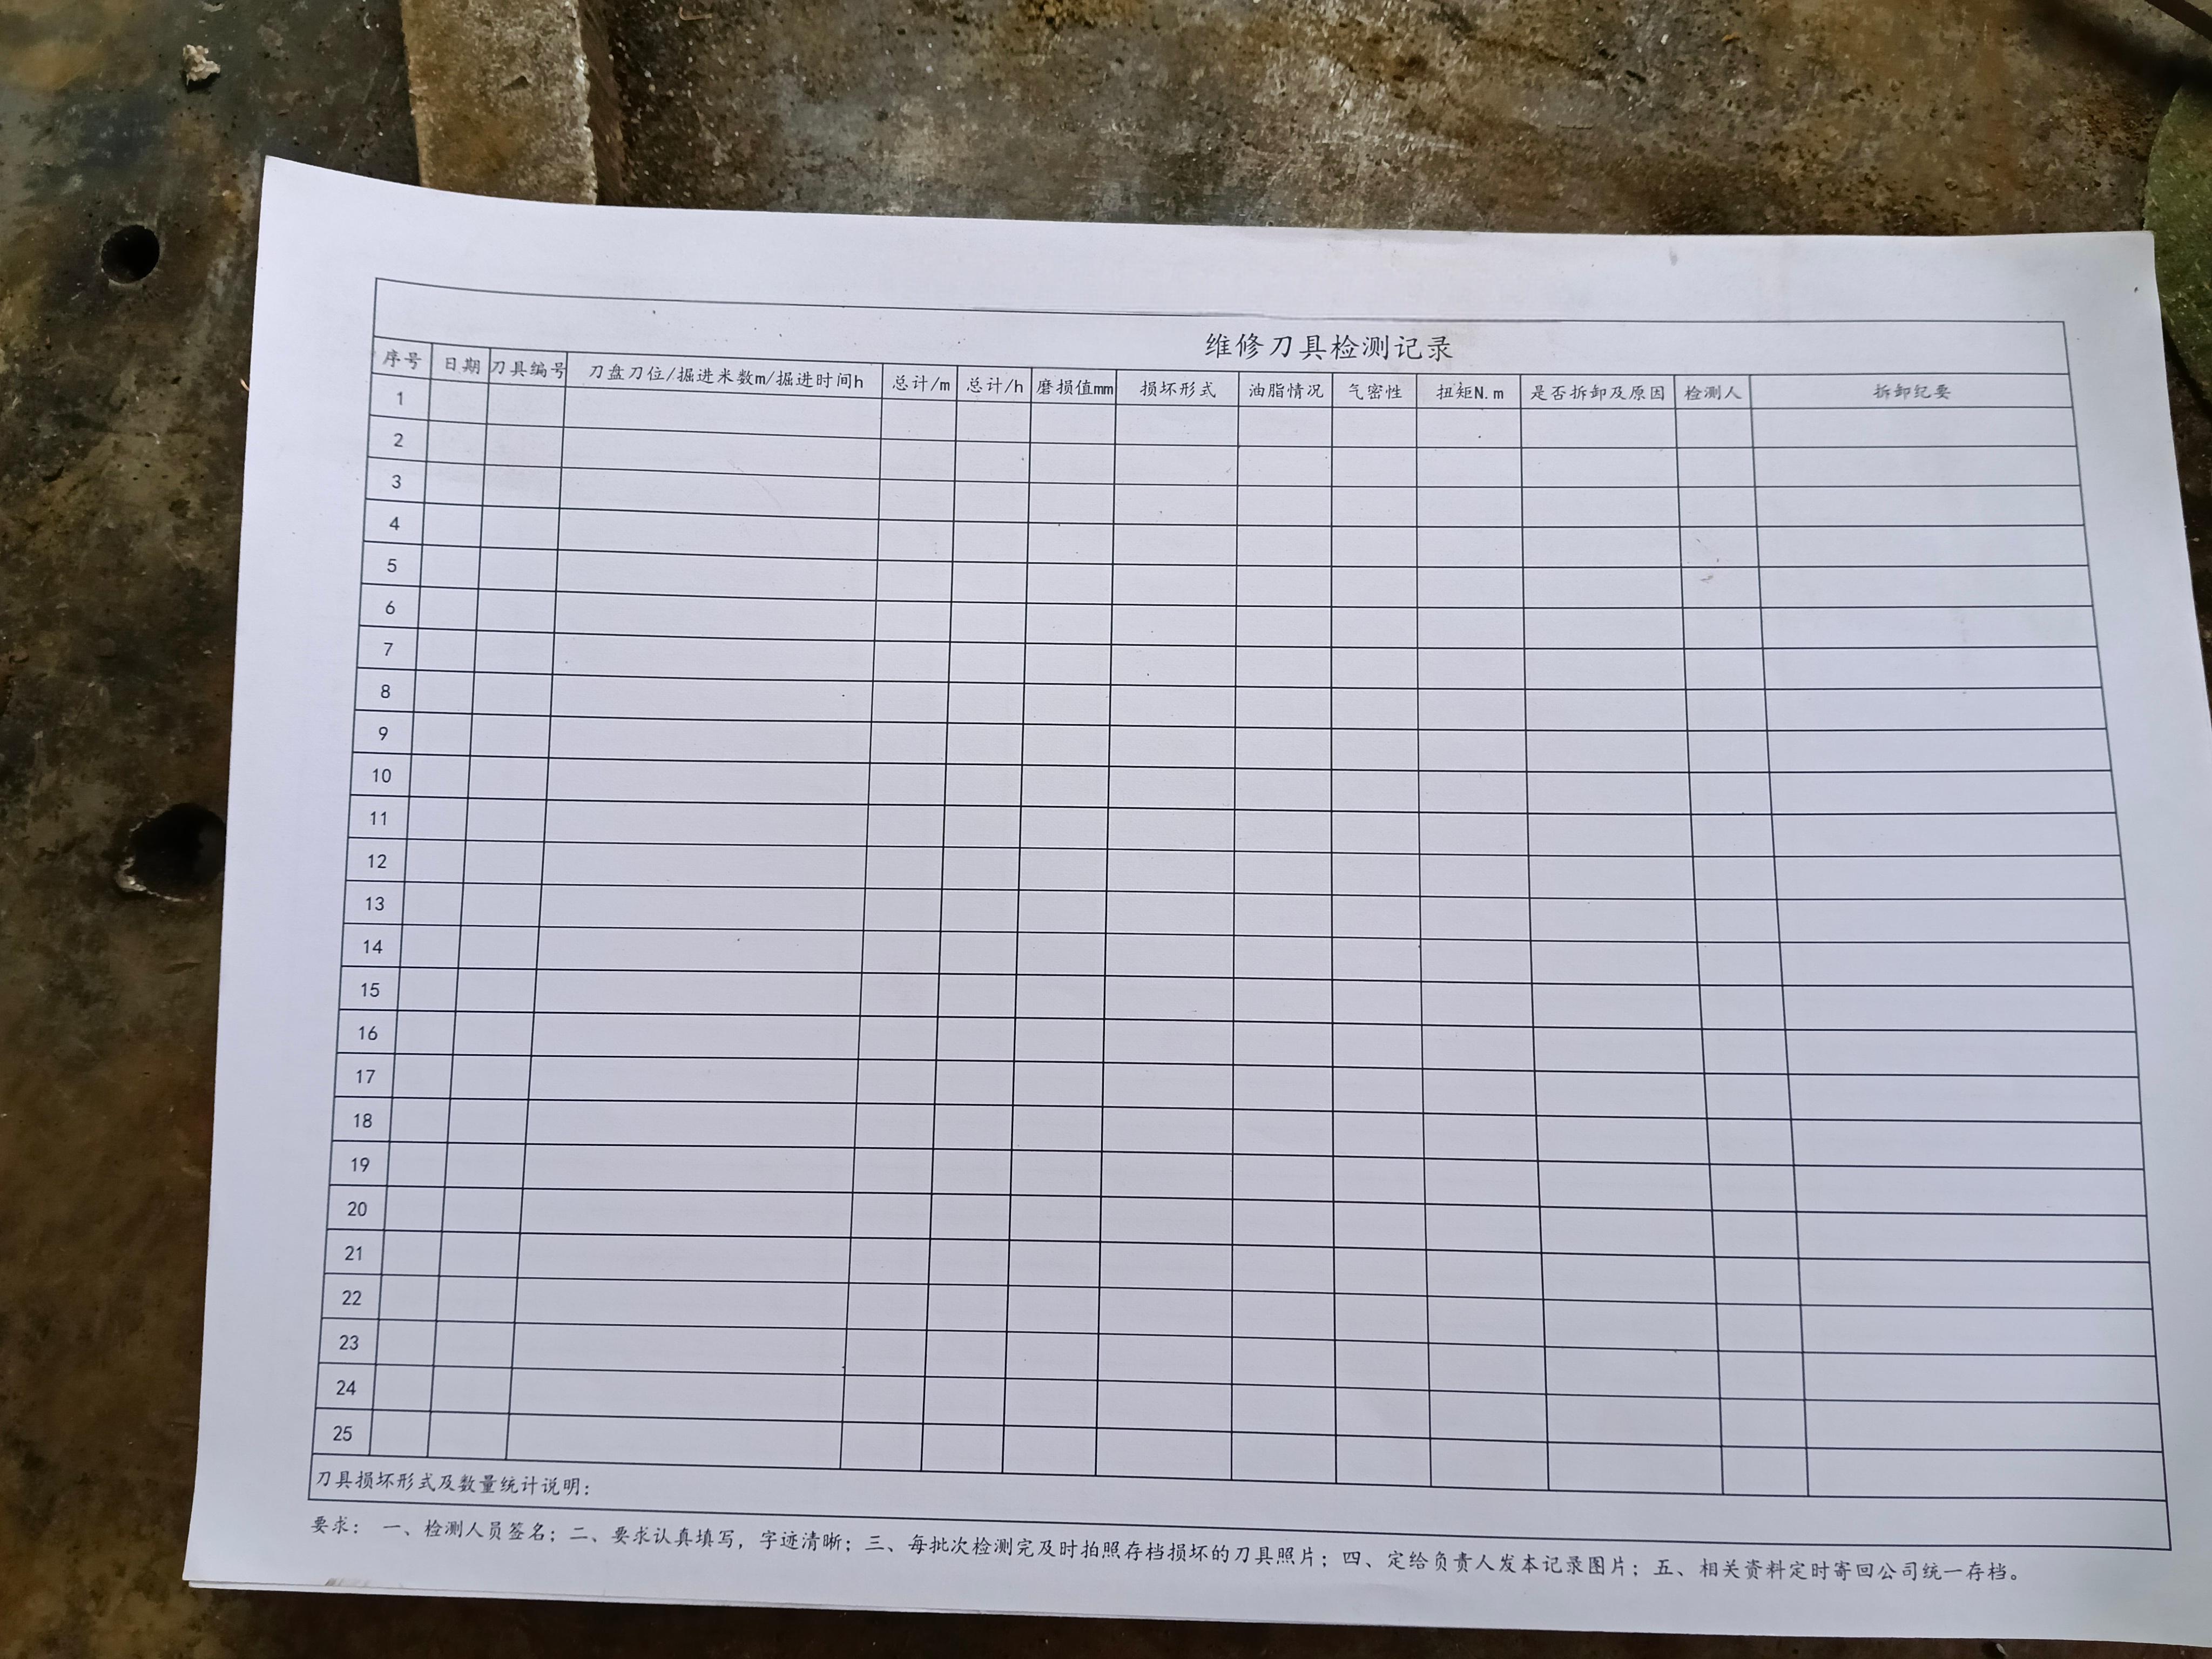
A consistent record helps the maintenance team compare wear over time and plan the next intervention. Qingyue’s cutter inspection record covers operating history, wear and the reason for any dismantling. A practical entry should include:
• Date and excavation chainage or interval
• Cutter number and position
• Radial wear value and measurements at multiple points
• Rotation condition
• Grease, leakage and sealing observations
• Visible damage and starting torque where applicable
• Condition of adjacent cutters
• Photo reference
• Whether the cutter was dismantled, the reason and the final action
The key principle is simple: operating data tells the team when to inspect; direct inspection determines what to do with the cutter. Measured wear, rotation condition, structural damage and the next safe inspection opportunity should be considered together.
Qingyue provides TBM disc cutter inspection, wear analysis, refurbishment and replacement support. To request an initial assessment, provide the cutter model, installation dimensions, cutterhead position, recent operating conditions, inspection measurements and clear photos of the cutter.




 Company Profile